
If you have a soft spot for bakery treats or have always wanted to craft a classic at home, this Cheese Danish Recipe is going to steal your heart. Imagine layers of buttery, flaky puff pastry hugging a creamy, luscious cheese filling that’s subtly sweet and fragranced with vanilla—a perfect harmony of textures and flavors. It’s one of those dishes that feels indulgent yet surprisingly simple to whip up, making it an irresistible morning treat or an impressive addition to any brunch spread.
Ingredients You’ll Need
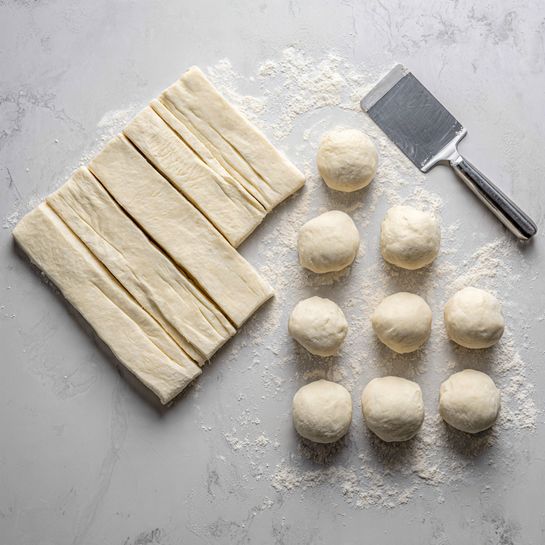
This Cheese Danish Recipe calls for a handful of straightforward ingredients that work together to create an elegant pastry. Each one adds a vital element: cream cheese lends richness, powdered sugar brings sweetness, and the puff pastry delivers that iconic flaky texture and golden color.
- Cream cheese (8 oz., softened): This is the star of the filling, providing that creamy, tangy base that contrasts beautifully with the sweet drizzle.
- Powdered sugar (1/3 cup + 1/2 cup): Used both in the filling and the icing, it melts perfectly to lend smooth sweetness without grit.
- Vanilla extract (1 tsp + 1/4 tsp): Brings a warm, aromatic note that elevates both the filling and the glaze.
- Salt (a pinch): Just enough to balance and enhance the flavors without overpowering the delicate sweetness.
- Puff pastry sheet (1 sheet, thawed): The foundation of the Danish, its buttery layers crisp beautifully in the oven.
- Egg (1, separated): The yolk enriches the cheese filling, while the white provides a glossy finish to the pastry’s border.
- Milk (2 Tbsp): Blended into the icing to give it a perfect drizzle consistency.
How to Make Cheese Danish Recipe
Step 1: Prepare and Preheat
Begin by lining a baking sheet with parchment paper for easy cleanup and setting your oven rack in the center. Preheat your oven to a toasty 400 degrees Fahrenheit. This ensures your puff pastry will bake evenly and crisp up pristinely.
Step 2: Mix the Cream Cheese Filling
In a bowl, combine the softened cream cheese, powdered sugar, vanilla extract, egg yolk, and a pinch of salt. Beat this mixture together until it becomes smooth, light, and fluffy. This creamy filling will be the luscious heart of your Cheese Danish Recipe.
Step 3: Prepare the Puff Pastry
Unfold your thawed puff pastry sheet onto the baking sheet, gently brushing off any excess flour. Use a sharp knife to cut the pastry into three equal strips along the seams, then slice each strip in half for a total of six rectangles. This size is perfect for individual Danish servings.
Step 4: Perforate the Borders
With a fork, carefully prick around the edges of each rectangle, maintaining about a half-inch border. This technique prevents the center from puffing up too much and keeps the filling nestled inside.
Step 5: Fill the Pastry
Spoon 2 heaping tablespoons of the cream cheese mixture onto the center of each rectangle, spreading it evenly but avoiding the perforated edges. This step is where your Danish really starts to come alive, promising that rich, tangy bite inside crisp layers.
Step 6: Add the Egg White Wash
Whip the egg white until frothy and use a pastry brush to lightly coat the edges of the puff pastry squares. This wash will give the borders a stunning glossy finish and help them develop that perfect golden color when baked.
Step 7: Bake to Perfection
Bake your Danish for 10 minutes, then swap the front and back positions of the baking sheet to ensure even cooking. Continue baking an additional 5 to 10 minutes until the borders are beautifully risen and golden brown. Once cooked, transfer them to a cooling rack to let them set before icing.
Step 8: Drizzle the Glaze
Mix the remaining powdered sugar, milk, and vanilla extract to make a smooth glaze. Allow your cheese Danishes to cool completely before drizzling, so the icing won’t melt into the pastry but instead forms a sweet, shiny coat. For an extra burst of flavor, try a light drizzle of strawberry jam thinned with a splash of water. You’re now ready for the grand taste test!
How to Serve Cheese Danish Recipe

Garnishes
Adding a personal touch with garnishes can make your Cheese Danish Recipe really stand out. Consider a sprinkle of toasted slivered almonds, a dusting of additional powdered sugar, or a few fresh berries to add color and texture. These little details elevate presentation and offer delightful flavor contrasts.
Side Dishes
Serve your Cheese Danish alongside a cup of rich, freshly brewed coffee or a vibrant fruit salad to balance the richness of the pastry with refreshing notes. It pairs beautifully with brunch classics like scrambled eggs or smoked salmon, creating a well-rounded meal that feels both special and satisfying.
Creative Ways to Present
Arrange the Danish on a wooden board with sprigs of fresh mint or edible flowers for a charming, rustic look that’s perfect for entertaining. For a festive twist, serve with a selection of jams and spreads so guests can customize their Danishes. These thoughtful touches turn a simple pastry into a memorable centerpiece.
Make Ahead and Storage
Storing Leftovers
If you find yourself with extra Cheese Danish Recipe pastries, store them in an airtight container at room temperature for up to two days. This keeps the puff pastry crisp while preserving the creamy filling’s freshness. Avoid refrigeration unless necessary, as it can make the puff pastry lose its delicate flakiness.
Freezing
You can freeze unbaked Cheese Danish pastries by wrapping them individually in plastic wrap and placing them in a freezer-safe bag. When ready to bake, thaw overnight in the fridge and proceed with the egg white wash and baking. This is a fantastic way to prepare ahead for special occasions or busy mornings.
Reheating
Warm your Cheese Danish gently in a preheated oven at 325 degrees Fahrenheit for about 5 to 7 minutes to revive that fresh-from-the-bakery feeling. Avoid microwaves if possible, as they tend to make the pastry soggy instead of crispy and flaky.
FAQs
Can I use a different cheese in this Cheese Danish Recipe?
Cream cheese is the classic choice because of its mild tang and smooth texture, but you could experiment with ricotta or mascarpone for a creamier, slightly different flavor. Just keep in mind these alternatives may alter the consistency of your filling.
Is puff pastry difficult to work with?
Not at all! Puff pastry is surprisingly forgiving and easy to handle. Just make sure it’s properly thawed and chilled before working with it, and avoid over-handling to keep those layers intact for maximum flakiness.
Can I make the glaze ahead of time?
Absolutely. Prepare the glaze a day ahead and keep it covered tightly in the refrigerator. Give it a quick stir before drizzling on your cooled Danishes for a perfectly smooth finish.
What should I do if I don’t have powdered sugar?
Powdered sugar is preferable because it dissolves smoothly, but you can make your own by blending regular granulated sugar in a food processor until superfine. This homemade version works well in a pinch.
How long will the recipe take from start to finish?
From mixing to baking, this Cheese Danish Recipe takes about 25 minutes, though timing may vary slightly with your oven or puff pastry thawing time. It’s a fantastic quick-bake that yields bakery-worthy results.
Final Thoughts
There’s something truly special about making your own pastry that tastes just as good as those from your favorite bakery. This Cheese Danish Recipe combines simplicity, flavor, and that wow-factor everyone loves. Once you try it, you’ll find it’s an effortless way to bring a little joy and indulgence into your kitchen. So preheat that oven, pull out the cream cheese, and start baking—delicious moments are waiting!
Print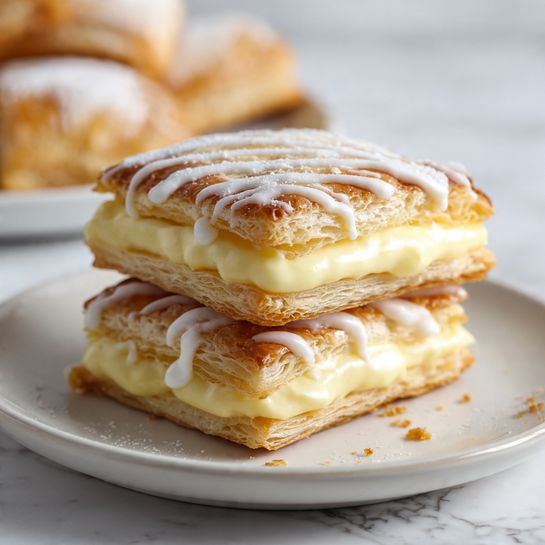
Cheese Danish Recipe
This delightful Cheese Danish recipe features a flaky puff pastry filled with a smooth and creamy sweetened cream cheese mixture. Topped with a glossy egg wash and finished with a simple vanilla glaze, these Danish pastries are perfect for breakfast, brunch, or a sweet snack that everyone will love.
- Total Time: 25 minutes
- Yield: 6 servings
Ingredients
Filling
- 8 oz. cream cheese, softened
- 1/3 cup powdered sugar
- 1 tsp vanilla extract
- 1 egg yolk
- 1 pinch salt
Pastry
- 1 sheet puff pastry, thawed
- 1 egg white
Glaze
- 1/2 cup powdered sugar
- 1/4 tsp vanilla extract
- 2 Tbsp milk
Optional
- 2 Tbsp strawberry jam, thinned with 1 tsp water
Instructions
- Prepare Oven and Filling: Line a baking sheet with parchment paper and position your oven rack in the center. Preheat the oven to 400°F. In a bowl, mix the softened cream cheese, powdered sugar, vanilla extract, egg yolk, and salt until the mixture is smooth and light in texture.
- Prepare Puff Pastry: Unfold the thawed puff pastry sheet and gently dust off any excess flour. Place it on the prepared baking sheet. Cut along the seams to create three equal-sized strips, then cut each strip in half to form six rectangles.
- Perforate Pastry Borders: Using a fork, lightly prick around the edges of each puff pastry rectangle, leaving about a half-inch border unperforated. This technique keeps the edges puffed while preventing the centers from rising too much.
- Fill Pastries: Spoon about 2 heaping tablespoons of the cream cheese filling onto the center of each pastry rectangle, spreading it evenly but keeping clear of the edges.
- Apply Egg White Wash: Beat the egg white until frothy. Using a pastry brush, lightly trace the borders of each puff pastry piece with the beaten egg white to create a shiny, golden finish once baked.
- Bake: Bake the Danish pastries at 400°F for 10 minutes. Then, rotate the baking sheet front to back and continue baking for another 5 to 10 minutes or until the pastry borders are puffed and golden brown. Remove the pastries using a spatula and cool them on a rack.
- Make and Add Glaze: In a small bowl, whisk together powdered sugar, vanilla extract, and milk to create a smooth glaze. Allow the Cheese Danish pastries to cool completely before drizzling the glaze over them so it does not melt into the warm pastry.
- Optional Jam Drizzle: For added flavor, you can drizzle the cooled Danish with 2 tablespoons of strawberry jam thinned with 1 teaspoon of water.
Notes
- Ensure the puff pastry is fully thawed before working with it to prevent tearing.
- Perforating the pastry’s border helps create that classic Danish look with raised edges holding the filling in place.
- Use a light hand with the egg white wash to avoid pooling which can affect puffing.
- Allow the pastries to cool completely before applying the glaze to maintain its texture and appearance.
- The optional strawberry jam adds a fruity note complementary to the creamy filling.
- Prep Time: 10 minutes
- Cook Time: 15 minutes
- Category: Dessert
- Method: Baking
- Cuisine: American


