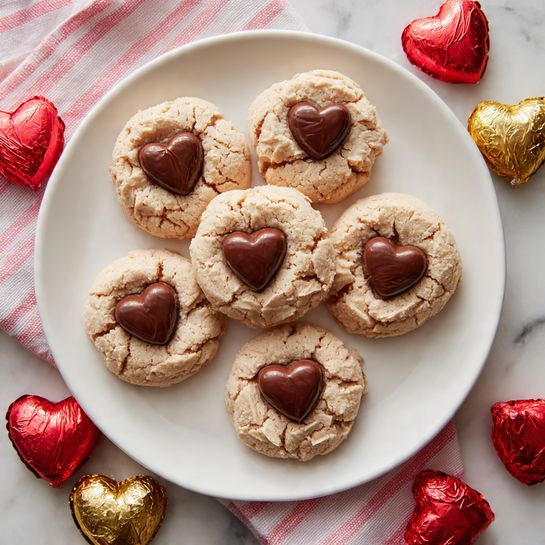
If you’re searching for a dessert that combines the richness of classic brownies with the striking color and subtle chocolate flavor of red velvet cake, this Red Velvet Brownies Recipe is your new best friend. These luscious, vibrant treats bring together a perfect balance of fudgy texture, deep cocoa notes, and that iconic red hue, making them an irresistible showstopper for any occasion. Whether it’s a cozy night in or a celebration with friends, these brownies add warmth, sweetness, and a pop of color that’s impossible to resist.
Ingredients You’ll Need

Every ingredient in this recipe plays a crucial role, from the creamy butter that imparts richness to the precise touch of red food coloring that brings these brownies to life. Simple yet essential, these ingredients come together to create a beautifully balanced texture and flavor that feels both familiar and delightfully unique.
- 3/4 cup unsalted butter (melted): Adds moisture and richness, ensuring a fudgy brownie base.
- 2 oz chopped semi-sweet chocolate bar: Deepens the chocolate flavor and creates a smooth texture.
- 1 & 1/4 cup granulated sugar: Sweetens and balances the cocoa and vinegar’s tang.
- 2 large eggs: Bind everything together, providing structure and moisture.
- 2 teaspoon vanilla extract: Enhances the chocolate flavor with warm, aromatic notes.
- 1 teaspoon white vinegar: Reacts with the cocoa powder to boost the red velvet color and adds a subtle tang.
- 1/2 tablespoon red gel food coloring: Gives you that signature vibrant red color without affecting the texture.
- 2 tablespoons unsweetened cocoa powder: Infuses rich chocolate flavor without extra sweetness.
- 1 & 1/4 cup all-purpose flour: Provides structure, ensuring the brownies hold together beautifully.
- 1/4 teaspoon salt: Balances sweetness and enhances depth of flavor.
- 1/2 cup white chocolate chips (optional): Adds a creamy contrast, whether folded in or drizzled on top.
How to Make Red Velvet Brownies Recipe
Step 1: Preheat and Prepare Your Pan
Start by heating your oven to 350°F and lining an 8×8 inch baking pan with parchment paper. This setup ensures your brownies bake evenly and come out smoothly without sticking, making clean-up easy and your presentation flawless.
Step 2: Melt Butter and Chocolate
In a large microwave-safe bowl, melt the butter and chopped semi-sweet chocolate together in 30-second intervals, stirring well after each. This combination creates the rich chocolate base that sets the tone for your brownies, so make sure it’s silky and smooth without burnt edges.
Step 3: Mix in Sugar and Eggs
Add your granulated sugar to the melted butter and chocolate mixture, stirring until fully combined. Then, incorporate the eggs one at a time, beating thoroughly after each addition. This process helps develop a velvety batter that’s perfectly smooth, ensuring your Red Velvet Brownies Recipe comes out dense but soft.
Step 4: Flavor with Vanilla, Vinegar, and Color
Stir in the vanilla extract, white vinegar, and red gel food coloring. These key additions make the brownies uniquely red velvet by enhancing the cocoa flavor and giving the batter its vibrant, unmistakable color.
Step 5: Combine Dry Ingredients
In a separate bowl, sift together the cocoa powder, flour, and salt. Sifting keeps the mixture light and prevents clumps, which helps maintain a tender crumb structure when mixed into your wet ingredients.
Step 6: Incorporate Dry Ingredients Gently
Gradually add the dry mixture into your wet batter, stirring until just combined. Be cautious not to overmix, or your brownies could turn out tough. If you want a little extra sweetness, fold in white chocolate chips here for delightful pockets of creamy goodness throughout.
Step 7: Bake to Perfection
Pour the batter evenly into your prepared pan, smoothing the top. Bake for about 30-35 minutes, checking with a toothpick; it should come out with a few moist crumbs but not wet batter. This timing secures that fudgy, dense texture that makes these brownies so addictive.
Step 8: Cool and Optional Drizzle
Once baked, let your brownies cool completely in the pan. For an elegant finishing touch, melt some white chocolate and drizzle it over the top, letting it set to create a beautiful contrast. Once cooled, slice your Red Velvet Brownies Recipe into squares and get ready to indulge!
How to Serve Red Velvet Brownies Recipe

Garnishes
A sprinkle of powdered sugar or a handful of white chocolate shavings on top can elevate your Red Velvet Brownies Recipe, adding a dash of charm and texture. Fresh raspberries or a dollop of whipped cream also pair beautifully, bringing a light freshness to these rich treats.
Side Dishes
Serve these brownies alongside a scoop of vanilla bean ice cream for a dreamy dessert, or pair with a cup of creamy latte or hot chocolate for a cozy, comforting experience. The velvety flavors in the brownies complement both warm and cold accompaniments wonderfully.
Creative Ways to Present
Try stacking the brownies into a mini tower drizzled with extra white chocolate and topped with edible gold leaf for a stunning presentation. Or, cut them into bite-sized squares and serve as part of a dessert platter alongside other red velvet-themed goodies like cupcakes or truffles.
Make Ahead and Storage
Storing Leftovers
Once cooled, store your Red Velvet Brownies in an airtight container at room temperature for up to four days. This keeps them moist and maintain their signature fudgy texture, ready whenever you want a sweet pick-me-up.
Freezing
If you want to enjoy these brownies later, wrap them tightly in plastic wrap and then place in a freezer-safe bag or container. They can be frozen for up to three months without losing their rich flavor or texture. Thaw overnight in the fridge for the best results.
Reheating
For a warm, just-baked feel, reheat brownies in the microwave for 10-15 seconds or until softly warmed through. This wakes up the gooey texture and amplifies the chocolate experience, making each bite feel fresh.
FAQs
Can I use regular food coloring instead of gel?
You can, but gel food coloring gives you a more vibrant and intense red without adding extra moisture, which helps keep the batter’s consistency just right. Regular liquid dye might make the batter thinner and could slightly affect the texture.
Are these brownies gluten-free?
The traditional recipe uses all-purpose flour, so it is not gluten-free. However, you can substitute a gluten-free flour blend cup for cup if you want to make a gluten-free version. Just be sure that your blend includes xanthan gum or another binder for best results.
Can I leave out the white vinegar?
While you technically can, the vinegar is important for reacting with the cocoa powder to achieve that classic red velvet tang and vibrant color. Leaving it out may affect both taste and the signature hue, so it’s best to keep it in if you want authentic results.
What’s the best way to melt the chocolate and butter?
Melting in the microwave at 30-second intervals and stirring in between is ideal to avoid burning. You can also use a double boiler if you prefer gentle, even heating, which also works beautifully.
Can I add nuts or other mix-ins?
Absolutely! Chopped pecans or walnuts would add a lovely crunch and complement the fudgy brownies nicely. Just fold them in at the same time you add white chocolate chips if using.
Final Thoughts
This Red Velvet Brownies Recipe is a true keeper—a delightful fusion of texture, flavor, and color that never fails to impress. Once you try these rich, velvety squares, you’ll find yourself coming back to the recipe again and again, whether for holiday treats or everyday indulgences. So go ahead, dive in, and share these sweet moments with the people you love! You’ll be amazed at how such a simple recipe can create such a memorable dessert experience.
Print
Red Velvet Brownies Recipe
Delight in these rich and moist Red Velvet Brownies, combining classic red velvet flavor with the fudgy texture of brownies. Perfectly sweetened and topped optionally with white chocolate chips or a drizzle of melted white chocolate, this easy-to-make dessert is ideal for sharing at gatherings or enjoying as a decadent treat.
- Total Time: 45 minutes
- Yield: 16 servings
Ingredients
Wet Ingredients
- 3/4 cup unsalted butter (melted)
- 2 oz chopped semi-sweet chocolate bar
- 1 & 1/4 cup granulated sugar
- 2 large eggs
- 2 teaspoon vanilla extract
- 1 teaspoon white vinegar
- 1/2 tablespoon red gel food coloring
Dry Ingredients
- 2 tablespoons unsweetened cocoa powder
- 1 & 1/4 cup all-purpose flour
- 1/4 teaspoon salt
Optional
- 1/2 cup white chocolate chips (optional mixed into the batter or melted and drizzled on top)
Instructions
- Preheat oven and prepare pan: Preheat your oven to 350°F (175°C) and line an 8×8 inch baking pan with parchment paper to prevent sticking and ensure easy removal.
- Melt butter and chocolate: In a large microwave-safe bowl, melt the unsalted butter and chopped semi-sweet chocolate in 30-second intervals, stirring after each, until fully melted and smooth.
- Mix wet ingredients: Add the granulated sugar into the melted mixture and stir until combined. Then, add the eggs one at a time, beating well after each addition. Stir in vanilla extract, white vinegar, and red gel food coloring thoroughly.
- Prepare dry ingredients: In a separate bowl, sift together the unsweetened cocoa powder, all-purpose flour, and salt to remove lumps and combine evenly.
- Combine wet and dry ingredients: Gradually fold the dry ingredients into the wet mixture, stirring just until combined to avoid overmixing. If desired, gently fold in the white chocolate chips to the batter for extra flavor and texture.
- Transfer and spread batter: Pour the batter into the prepared baking pan and spread evenly for uniform baking.
- Bake: Bake in the preheated oven for 30-35 minutes, or until a toothpick inserted into the center comes out with a few moist crumbs but no wet batter.
- Cool: Allow brownies to cool completely in the pan to set properly before slicing into 16 squares.
- Optional topping: If desired, melt additional white chocolate and drizzle it over the cooled brownies. Let the drizzle set before slicing and serving.
Notes
- Ensure not to overmix the batter to maintain a tender brownie texture.
- White chocolate chips add a lovely contrast, but you can omit or substitute with nuts if preferred.
- Using an 8×8 inch pan ensures the brownies bake evenly with the right thickness.
- The vinegar and red food coloring give the brownies their classic red velvet color and subtle tang.
- Allowing the brownies to cool fully is important for clean cutting and better texture.
- Store leftover brownies in an airtight container at room temperature for up to 3 days.
- Prep Time: 10 minutes
- Cook Time: 35 minutes
- Category: Dessert
- Method: Baking
- Cuisine: American